7 Best Pool Resurfacing Tools for DIY Repairs That Pros Swear By
Discover the 7 essential pool resurfacing tools that can help DIY homeowners save money, repair damage, and achieve professional-quality results that extend the life of their swimming pools.
Tackling pool resurfacing on your own can save you thousands of dollars, but you’ll need the right tools to achieve professional-quality results. From trowels and mixers to sanders and sprayers, specific equipment makes the difference between a smooth, long-lasting finish and a frustrating, expensive do-over.
With proper tools in hand, you’ll be able to repair cracks, remove old plaster, and apply new surfacing materials with confidence – extending your pool’s life while maintaining its aesthetic appeal.
Disclosure: As an Amazon Associate, this site earns from qualifying purchases. Thank you!
7 Must-Have Tools for DIY Pool Resurfacing Projects
- Acid Wash Sprayer – A high-quality acid wash sprayer is essential for properly preparing your pool surface. You’ll need this specialized tool to apply muriatic acid evenly across the old surface, removing stains and etching the surface for better adhesion. Look for sprayers with acid-resistant components and adjustable nozzles for controlled application.
- Heavy-Duty Pool Trowel – Invest in a professional-grade pool trowel with a rounded edge to achieve that smooth, flawless finish. You’ll use this tool to apply and spread the new surface material evenly. The best pool trowels feature stainless steel construction with comfortable ergonomic handles that reduce hand fatigue during the lengthy application process.
- Concrete Mixer – A reliable concrete mixer ensures your resurfacing material achieves the perfect consistency. You’ll need consistent mixing for proper application and curing. Choose a portable mixer with at least 3.5 cubic feet capacity and variable speed settings to handle different resurfacing compounds like plaster, pebble, or quartz.
- Diamond Grinding Wheel – For removing stubborn old plaster and smoothing rough patches, a diamond grinding wheel attached to a grinder is indispensable. You’ll find this tool particularly useful for addressing uneven areas and ensuring a uniform base. Select a wheel with medium grit (around 50-60) for effective material removal without excessive gouging.
- Tile and Grout Removal Tool – When resurfacing reaches the tile line, you’ll need a specialized tool to carefully remove old grout without damaging tiles. Look for oscillating multi-tools with grout removal attachments that provide precision in tight spaces and reduce the risk of costly tile damage during your project.
- Extension Pole System – Reach deep pool areas safely with a quality extension pole system with interchangeable heads. You’ll need this versatile tool for cleaning, acid washing, and applying material to difficult-to-reach areas. The best systems feature lightweight fiberglass construction with secure locking mechanisms and lengths extending to at least 16 feet.
- Wet/Dry Shop Vacuum – Keep your work area clean and your pool surface free of debris with a powerful wet/dry vacuum. You’ll use this throughout the project to remove water, dust, and loose material. Choose a model with at least 6 horsepower and a large-capacity tank to minimize emptying during your resurfacing project.
1. High-Quality Tile and Grout Removal Tools
When tackling DIY pool resurfacing, the first critical step is often removing old tile and grout. Having the right removal tools ensures you’ll start your project on solid footing.
Electric Grout Removal Tools vs. Manual Options
Electric grout removal tools like those from Bosch and DeWalt offer superior efficiency and time savings for larger pool resurfacing projects. These power tools make quick work of stubborn grout and deliver consistent results. Manual options such as grout saws and scrapers provide better precision for detailed work around intricate tile patterns and are typically more budget-friendly.
Top Brands for Reliable Grout Removal
Bosch leads the market with powerful, durable electric grout removal tools that withstand the demands of pool resurfacing projects. DeWalt products earn high marks from both professionals and DIYers for their reliability and performance in wet environments. For precision detail work, Dremel rotary tools with specialized grout removal attachments deliver exceptional control when working around delicate pool tiles or in tight corners.
2. Professional-Grade Pool Surface Preparation Tools
Diamond Cup Grinding Wheels for Concrete Surfaces
Diamond cup grinding wheels are essential for achieving proper surface preparation before resurfacing your pool. These powerful tools effectively remove old plaster and smooth out rough spots on concrete surfaces with precision. Their diamond-embedded segments cut through tough materials while creating the ideal texture for new coating adhesion. You’ll find these wheels compatible with standard grinders, making them accessible for serious DIY pool renovators.
Heavy-Duty Surface Preparation Kits
Dustless blasting equipment represents the gold standard in professional surface preparation. These kits dramatically increase production rates by quickly stripping away old plaster, gelcoat, and surface materials without creating harmful dust clouds. For larger pool resurfacing projects, investing in or renting a dustless blaster can save you countless hours of manual labor. The system combines water with abrasive media to create an efficient stripping action that leaves surfaces perfectly prepped for resurfacing.
3. Essential Acid Washing Equipment
Acid washing is a critical step in pool resurfacing that requires specialized equipment to ensure both effectiveness and safety. The right tools make all the difference when handling potentially hazardous chemicals.
Acid-Resistant Sprayers and Applicators
Acid-resistant sprayers are non-negotiable for even distribution of muriatic acid across your pool surface. Look for sprayers with polyethylene tanks and acid-resistant components that won’t corrode or break down during use. Pump sprayers with adjustable nozzles give you better control over application rates, ensuring you can maintain consistent coverage without wasting solution or creating dangerous pooling.
Protective Gear for Safe Acid Application
Never attempt acid washing without complete protective gear. At minimum, you’ll need chemical-resistant gloves that extend past your wrists, ANSI-approved safety goggles that seal completely around your eyes, and a respirator rated for acid fumes. Add acid-resistant rubber boots and long-sleeved clothing to protect against splashes. Remember that muriatic acid can cause severe burns and respiratory damage – proper protection isn’t optional when working with these powerful chemicals.
4. Precision Patching and Repair Tools
When it comes to DIY pool resurfacing, having the right precision tools makes all the difference between a patchy repair and professional-looking results. These specialized tools help you address specific damage areas effectively.
HydroBOND® Roll-on Plaster Kit
The HydroBOND® Roll-on Plaster Kit is a game-changer for DIY pool repairs. It features a proprietary plaster blend specifically formulated for concrete and plaster pools, gunite, shotcrete, and masonry surfaces. You’ll appreciate how this kit increases cement strength while reducing shrinkage, making your repairs more durable. The roll-on application method simplifies the process, allowing even beginners to achieve professional-looking results without specialized skills.
SANI-TRED Repair and Sealant System
SANI-TRED’s comprehensive system offers everything you need for effective pool surface repairs. This all-in-one solution includes specialized products for filling cracks and holes, priming surfaces, and applying a waterproof rubber-like coating. It works exceptionally well on concrete, gunite, and fiberglass pools, creating a lasting, waterproof barrier. The system’s versatility makes it ideal for addressing multiple types of damage in a single repair session.
Dustless Blasting Equipment
For more extensive resurfacing projects, dustless blasting equipment proves invaluable. This specialized tool efficiently strips failing or loose plaster without creating harmful dust clouds. After blasting away damaged material, you’ll apply a bond coat to ensure proper adhesion of new plaster. This equipment significantly reduces labor time while creating an ideal surface for your new finish to bond with.
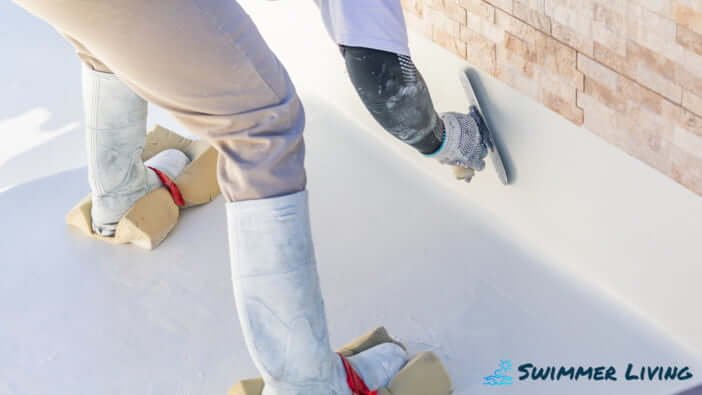
Specialty Trowels for Smooth Application
Quality plastering trowels are essential for achieving that glass-smooth finish on your pool surface. Look for stainless steel trowels with rounded edges that won’t leave marks in fresh plaster. Notched trowels help you apply patching compounds evenly, ensuring consistent thickness across repair areas. The right trowel makes blending new patches with existing surfaces virtually seamless.
Waterproof Patching Compounds and Applicators
Bond Kote and similar bonding agents are crucial for proper adhesion between old and new surfaces. Apply these with rollers before adding new plaster or coating materials. Products like SANI-TRED’s waterproof coating create flexible, rubber-like finishes that resist cracking and water penetration. The HydroBOND® plaster coating applies easily with a roller, delivering a smooth, professional finish that extends your pool’s lifespan.
5. Pool Plaster Mixing and Application Equipment
Proper mixing and application equipment are critical components of any successful DIY pool resurfacing project. These tools ensure your plaster achieves the right consistency and is applied evenly for a professional-quality finish.
Versatile Mixing Drills and Paddles
A high-powered mixing drill with specialized paddles is essential for achieving the perfect plaster consistency. Look for drills with variable speed settings (500-700 RPM) and torque control to prevent air bubbles from forming in your mixture. The right paddle attachment, typically a helical or spiral design, ensures thorough blending without introducing excess air. Brands like DeWalt and Makita offer reliable options that can handle the demanding task of mixing dense pool plaster compounds.
Professional-Grade Trowels and Floats
Invest in stainless steel pool trowels with rounded edges and ergonomic handles for precise plaster application. A 14-inch rectangular trowel works best for larger areas, while smaller margin trowels help with detail work around steps and corners. Complement these with a selection of finishing floats—both foam and magnesium types—to achieve different surface textures. The float’s flexible edge helps eliminate trowel marks and create that smooth, professional finish that distinguishes a well-executed resurfacing job from an amateur attempt.
6. Surface Finishing Tools for a Polished Look
Texture Rollers and Specialty Brushes
Texture rollers are essential for creating uniform patterns across your newly resurfaced pool. Available in various designs, these rollers help achieve consistent texturing that improves both aesthetics and traction. Specialty brushes complement rollers by smoothing out imperfections and eliminating air pockets in the plaster. Look for brushes with flexible bristles designed specifically for pool surfaces to achieve that professional finish without leaving brush marks.
Pool Surface Polishing Equipment
Diamond polishing pads attached to power drills transform a good resurfacing job into a showstopper. These pads, available in varying grits (80-3000), progressively refine your pool surface to achieve a glass-like finish. For premium aggregate finishes like Diamond Brite, specialized applicators ensure proper material distribution and embedding. Quality polishing equipment reduces the need for acid washing and creates a smoother surface that resists algae growth and staining while extending the lifespan of your resurfacing work.
7. Cleanup and Maintenance Tools for Post-Resurfacing
The final phase of your DIY pool resurfacing project requires proper cleanup and maintenance to protect your investment and ensure longevity of your new surface.
Industrial Vacuums for Debris Collection
Industrial vacuums are essential for post-resurfacing cleanup, efficiently removing dust, debris, and small particles that could compromise your new finish. These powerful tools capture fine plaster dust that regular vacuums can’t handle. Look for wet/dry options with HEPA filtration to ensure thorough cleaning without releasing particles back into the air around your newly resurfaced pool.
Water Pumps and Filtration Systems
High-quality water pumps are crucial for refilling your pool after resurfacing, preventing contamination of your pristine new surface. Your filtration system needs to be in perfect working order to maintain water clarity during the critical curing period. Products like variable-speed pumps offer energy efficiency while providing the necessary circulation to properly distribute chemicals that stabilize your new surface coating. Consider upgrading filters to finer micron ratings for the first few weeks after resurfacing.
Conclusion: Building Your DIY Pool Resurfacing Toolkit
Armed with these seven essential tools you’re now ready to tackle your pool resurfacing project with confidence. The right equipment makes all the difference between a professional-looking finish and a disappointing result. Remember that investing in quality tools pays off through better durability precision and efficiency.
Your pool is a significant investment in your home and taking the DIY approach with proper tools can save you thousands while delivering outstanding results. As you build your resurfacing toolkit focus on versatility and durability to ensure these tools serve you well beyond your current project.
Start small if you’re new to pool maintenance and gradually expand your collection as your skills grow. With patience the right tools and careful attention to detail you’ll transform your pool surface into a beautiful lasting finish you can proudly enjoy for years to come.
Frequently Asked Questions
Can I really save money by resurfacing my pool myself?
Yes, DIY pool resurfacing can save you significant money compared to hiring professionals, often thousands of dollars. However, success depends on having the right tools and following proper techniques. With proper equipment like trowels, mixers, sanders, and sprayers, homeowners can achieve professional-quality results while extending their pool’s lifespan.
What are the essential tools needed for DIY pool resurfacing?
The seven must-have tools include: acid wash sprayer, heavy-duty pool trowel, concrete mixer, diamond grinding wheel, tile and grout removal tool, extension pole system, and wet/dry shop vacuum. Each tool serves a specific purpose in the resurfacing process, from surface preparation to material application and cleanup.
How do I properly remove old tile and grout?
Use high-quality tile and grout removal tools for this critical step. Electric options from brands like Bosch and DeWalt work best for larger projects, while manual tools or Dremel rotary tools provide precision for intricate patterns and delicate tiles. The right tool depends on your project size and tile configuration.
What surface preparation tools do I need?
Professional-grade diamond cup grinding wheels are essential for removing old plaster and smoothing rough spots. For larger projects, consider dustless blasting equipment, which combines water with abrasive media to efficiently strip away old materials without creating harmful dust clouds, saving significant time and labor.
Is acid washing necessary when resurfacing a pool?
Yes, acid washing is a critical step that requires acid-resistant sprayers for even muriatic acid distribution. Always use proper protective gear including chemical-resistant gloves, safety goggles, and respirators, as muriatic acid can cause severe burns and respiratory damage if mishandled.
What tools are needed for patching and repairs?
For professional-looking repairs, consider systems like the HydroBOND® Roll-on Plaster Kit or SANI-TRED Repair and Sealant System. Specialty trowels and waterproof patching compounds ensure smooth application and proper adhesion. For extensive damage, dustless blasting equipment efficiently strips old plaster without creating dust.
What mixing equipment should I use for pool plaster?
Invest in high-powered mixing drills with specialized paddles from brands like DeWalt or Makita to achieve the proper plaster consistency. Professional-grade stainless steel trowels and finishing floats are crucial for precise application and a smooth finish that distinguishes professional work from amateur attempts.
How can I achieve a professional finish on my resurfaced pool?
Use texture rollers and specialty brushes to create uniform patterns and smooth out imperfections. Diamond polishing pads in varying grits, attached to power drills, can achieve a glass-like finish that not only improves aesthetics but also helps resist algae growth and staining, extending the lifespan of your resurfacing work.
What cleanup tools do I need after resurfacing?
Industrial vacuums with HEPA filtration are essential for capturing fine plaster dust. High-quality water pumps help with refilling and maintaining filtration during the curing period. Consider upgrading to finer micron filters for the initial weeks post-resurfacing to effectively stabilize the new surface coating.
How long does DIY pool resurfacing typically take?
A DIY pool resurfacing project typically takes 1-2 weeks for an average-sized residential pool, depending on your experience level and project complexity. Proper surface preparation accounts for about 40% of this time. Allow an additional 7-10 days for proper curing before refilling the pool completely.